For my mother-in-law's upcoming birthday I decided to make her an apron. I found a cute fabric that I thought would coordinate well with her kitchen decor.
I started the apron yesterday and finished it today. It was quick, fun and easy to make. Here's a little tutorial in case you'd like to try your hand at making this apron.
Materials used:
* 2- 28" x 18" cuts of coordinating fabric (1 cut from each fabric) for the apron front/back
* 4- 7" x 7" cuts of coordinating fabric (2 cuts from each fabric) for the pockets
* 2- 1" x 7" cuts of coordinating fabric (1 cut from each fabric) for the bias tape for the pockets
* 2- 4.5" x 44"cuts of fabric for the tie
* Coordinating thread
 *Based on these dimensions, you will need 1/2 yard of one fabric and 3/4 yard of the other fabric. (You'll cut the ties out of the second fabric.)
* Seam allowance - I used the presser foot width
First, you'll need the two apron pieces. Fold each piece in half (so that you have 18" x 14"). Use a bowl (or freehand) a curve onto what will be one of the bottom corner of the apron. Do this to both pieces and cut along the curve.


Next, get your pocket pieces. Fold each piece in half. Use a bowl (or freehand) a curve on one corner. Repeat on all pieces. Cut along line.
 I made one pocket for each side of the apron (you could always make more). Place 2 pocket pieces (from the same fabric) together with right sides facing. Sew along sides and curve (leaving top open). Use pinking shears and trim edges close to seam. (You could use regular scissors and cut notches near curves). Turn right side out and iron flat. Repeat for both pockets.
For a nice finishing touch to the pockets, make bias tape from the 2 fabrics. This uses the 1" x 7" pieces.
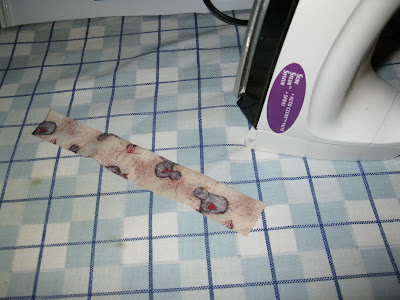 To make bias tape fold each piece in half lengthwise (makes a piece 1/2" by 7") and iron flat.
 Open the fabric and fold each edge in toward the middle fold. Iron flat.
 Now fold in half again and iron flat.
 Repeat for the second piece and voila, you have bias tape!
Now, place your homemade bias tape along the top of the pocket you made. (I used the solid bias tape on the pocket with the print, and vice versa). Fold the ends in as best as you can and pin the bias tape in place.
 You may need to trim the ends of the bias tape a bit if it is too long. Sew the bias tape on close to the bottom edge of the tape. Start very slowly so the piece doesn't bunch up in the machine. (I find that using the handwheel helps me to keep from going too fast at the beginning and the end of the pocket.) Repeat for second pocket.

Mark the center of each apron piece and the center of each pocket. Place the pockets about 5 1/2" down from the top of the apron pieces. Pin in place. Attach the pockets to the apron by stitching very close to the edge of the pocket. Reinforce the tops of the pockets by stitching back and forth a couple of times.

Next, you'll work on the tie. You'll make the tie like you made the bias tape. First, sew both pieces for the tie together so that you have 1 piece of fabric that is 4.5" x 88". Then fold the piece in half lengthwise and iron flat. Then open up the piece and fold the edges in toward the center. Iron flat. Fold in half again and iron flat. To give some shape to the tie, you can make the ends curved. You'll need to unfold the tie (just once so that edges are still in toward the center). Now fold so that the right sides are facing. Draw identical curves on each end. Sew along the curve. Trim close to the seam.
 Turn right side out and iron flat. Repeat on other end.
Place both apron pieces together with right sides facing. Sew along sides and bottom (leaving top open).
 Turn right side out and iron seams flat. Topstitch close to the edges around sides and bottom.

Next you can add some gathering to the top of the apron. 1/2" down from the top of the apron pieces, use your machine's longest stitch to sew across the entire top of the piece. When done, gently pull one of the threads and the fabric will begin to gather. Play with the fabric until it looks the way you want. You can do a lot or a little gathering... it's all about what you prefer. Knot off the ends of the thread so the gathering stays in place.
 Using your sewing machine, sew a straight line across the top of this piece to secure the gathering. (You can skip this step, but I find that it helps to keep the fabric & gathering from shifting too much when sewing on the tie)

You're almost done!!!
Mark the center of the apron and the center of the tie. Open the tie and slide the top of the apron into it. Fold the tie back in half and pin in place. Also, pin along the tie to keep the folded edges lined up.
 Starting at the center of the apron, topstitch along the tie, close to the bottom edge of the tie (making sure to go through both the front AND back of the tie). Continue to topstich to the end and along the curve of the tie.
 Repeat on the other side.
Wash off any marks you made on the fabric and iron the apron if need be.
That's it!!! Enjoy your new apron... or give it as a gift!
*Notes: I am 5'2" and the apron is about knee length on me. You may want to make it longer for a taller cook. All dimensions can be scaled up or down to fit your needs.


Materials used:
* 2- 28" x 18" cuts of coordinating fabric (1 cut from each fabric) for the apron front/back
* 4- 7" x 7" cuts of coordinating fabric (2 cuts from each fabric) for the pockets
* 2- 1" x 7" cuts of coordinating fabric (1 cut from each fabric) for the bias tape for the pockets
* 2- 4.5" x 44"cuts of fabric for the tie
* Coordinating thread
* Seam allowance - I used the presser foot width
First, you'll need the two apron pieces. Fold each piece in half (so that you have 18" x 14"). Use a bowl (or freehand) a curve onto what will be one of the bottom corner of the apron. Do this to both pieces and cut along the curve.
Next, get your pocket pieces. Fold each piece in half. Use a bowl (or freehand) a curve on one corner. Repeat on all pieces. Cut along line.
For a nice finishing touch to the pockets, make bias tape from the 2 fabrics. This uses the 1" x 7" pieces.
Now, place your homemade bias tape along the top of the pocket you made. (I used the solid bias tape on the pocket with the print, and vice versa). Fold the ends in as best as you can and pin the bias tape in place.
Mark the center of each apron piece and the center of each pocket. Place the pockets about 5 1/2" down from the top of the apron pieces. Pin in place. Attach the pockets to the apron by stitching very close to the edge of the pocket. Reinforce the tops of the pockets by stitching back and forth a couple of times.
Next, you'll work on the tie. You'll make the tie like you made the bias tape. First, sew both pieces for the tie together so that you have 1 piece of fabric that is 4.5" x 88". Then fold the piece in half lengthwise and iron flat. Then open up the piece and fold the edges in toward the center. Iron flat. Fold in half again and iron flat. To give some shape to the tie, you can make the ends curved. You'll need to unfold the tie (just once so that edges are still in toward the center). Now fold so that the right sides are facing. Draw identical curves on each end. Sew along the curve. Trim close to the seam.
Place both apron pieces together with right sides facing. Sew along sides and bottom (leaving top open).
Next you can add some gathering to the top of the apron. 1/2" down from the top of the apron pieces, use your machine's longest stitch to sew across the entire top of the piece. When done, gently pull one of the threads and the fabric will begin to gather. Play with the fabric until it looks the way you want. You can do a lot or a little gathering... it's all about what you prefer. Knot off the ends of the thread so the gathering stays in place.
You're almost done!!!
Mark the center of the apron and the center of the tie. Open the tie and slide the top of the apron into it. Fold the tie back in half and pin in place. Also, pin along the tie to keep the folded edges lined up.
Wash off any marks you made on the fabric and iron the apron if need be.
That's it!!! Enjoy your new apron... or give it as a gift!
*Notes: I am 5'2" and the apron is about knee length on me. You may want to make it longer for a taller cook. All dimensions can be scaled up or down to fit your needs.
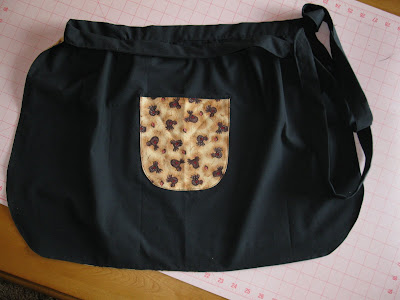
Here is my finished product.
Front side:
Back side:
Comments