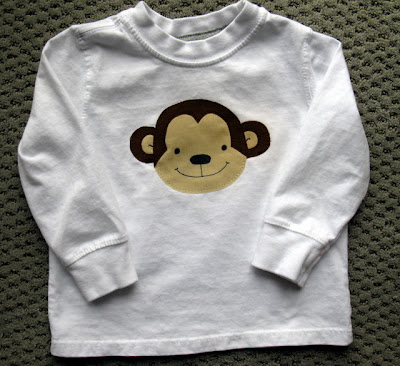
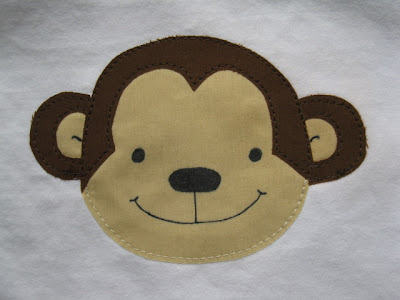
Month of gift making project 8 (AND TUTORIAL): Monkey applique t-shirt for my son's 2nd birthday!
Here's the finished product:
Here's the tutorial:
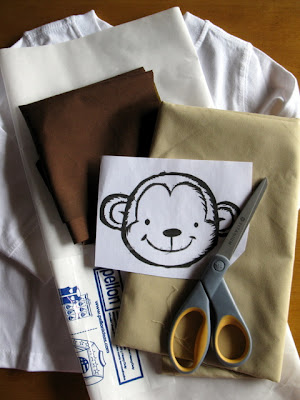
Gather your materials -
T-shirt (or make your own)
Monkey clipart (I found mine here)
Brown scraps of fabric & thread to match
Tan scraps of fabric & thread to match
Pellon Wonder-Under scraps (or any other brand of lightweight fusible web)
Pellon lightweight fusible interfacing scrap (or any other brand)
Permanent fabric marker OR embroidery thread
and of course scissors, a pencil, and a sewing machine if you want to stitch around your applique
1) Pre-wash the t-shirt and the fabric to be used for the applique.
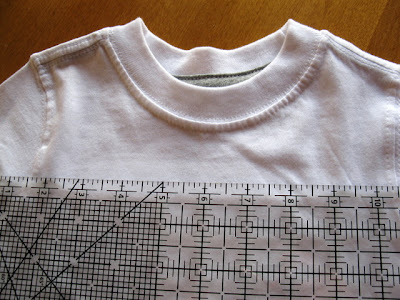
2) Looking at the t-shirt, decide roughly what size you'd like the monkey face to be.
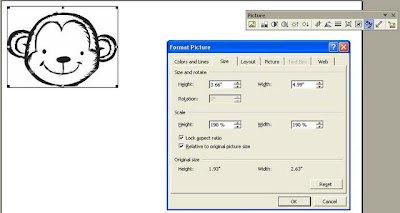
3) If you're artistic, draw a monkey face. If you're like me, find some monkey clipart online. If you need to resize it then copy and paste the graphic into MS Word. Right click on the graphic. Select Show Picture Toolbar. Click on the Format Picture icon. Click on the Size tab and adjust the size. Print out graphic.
4) Now is a good time to make sure that you like the size of the graphic. Place it on the t-shirt to make sure you like how it looks.
5) Cut out a piece of Wonder-Under as large as the entire monkey head. Place it (PAPER SIDE UP, rough side down) on top of the monkey graphic. Trace around the outer edge of the head and trace the facial features.
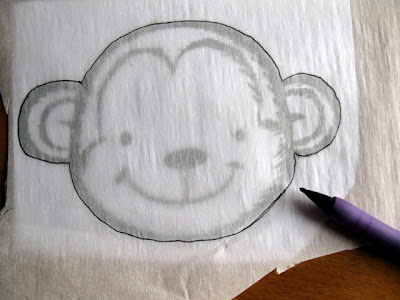
6) Iron this piece onto the tan piece of fabric.
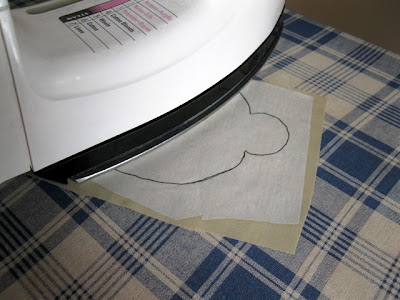
7) Trace the parts of the head you want to be brown ( the outer parts of the ears and upper part of the head).
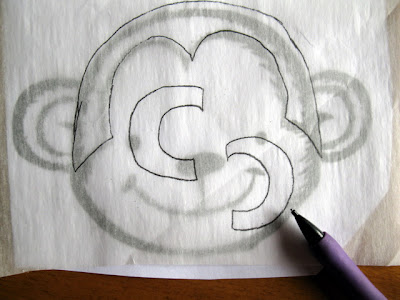
You could probably trace around all the brown part and make it one piece. I thought it would be difficult to cut out, so I cut the pieces out separately.
8) Iron these pieces on to the brown fabric.
9) Now that the Wonder-Under is ironed to the fabric, cut out all pieces along the trace lines. Here is what you'll have:
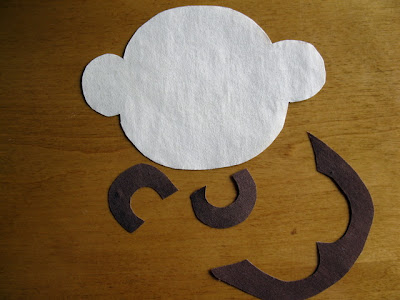
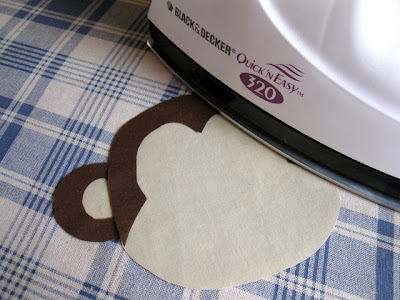
10) Peel the paper backing off of the BROWN PIECES OF FABRIC only. Place the brown ears and then the brown top of the head onto the tan piece of fabric. Iron.
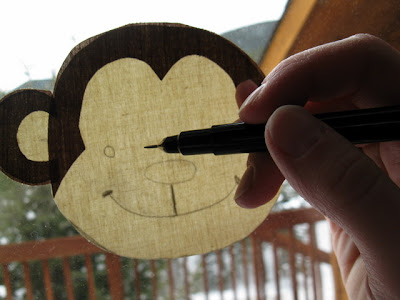
11) Hold the monkey head up to a window so that you can see the tracings for the facial features. With a permanent fabric pen draw the eyes, nose, mouth.
If you would prefer, you can draw the facial features on lightly with a pencil and then go back and embroider them.
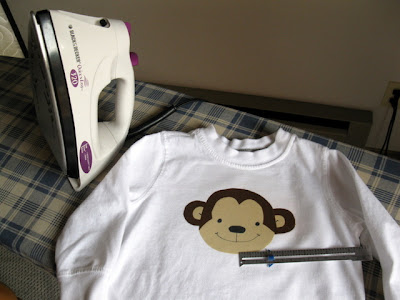
12) Peel the paper backing off of the tan piece of fabric. Place the monkey head on top of the t-shirt. Use a ruler if needed to center. Iron.
13) Optional- Iron a piece of the lightweight fusible interfacing (slightly larger than your graphic) on the inside of the shirt under the applique image. This adds stability to the knit fabric. Stitch around the monkey head to further secure the pieces.
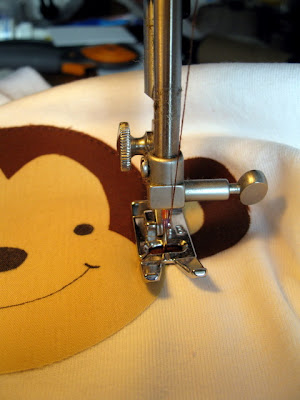
Stitch VERY slowly and don't get too close to the edge of the fabric.
14) You're done!
For more tips and trips for simple machine applique go here.

Here's the finished product:

Here's the tutorial:
Gather your materials -
T-shirt (or make your own)
Monkey clipart (I found mine here)
Brown scraps of fabric & thread to match
Tan scraps of fabric & thread to match
Pellon Wonder-Under scraps (or any other brand of lightweight fusible web)
Pellon lightweight fusible interfacing scrap (or any other brand)
Permanent fabric marker OR embroidery thread
and of course scissors, a pencil, and a sewing machine if you want to stitch around your applique

1) Pre-wash the t-shirt and the fabric to be used for the applique.
2) Looking at the t-shirt, decide roughly what size you'd like the monkey face to be.

3) If you're artistic, draw a monkey face. If you're like me, find some monkey clipart online. If you need to resize it then copy and paste the graphic into MS Word. Right click on the graphic. Select Show Picture Toolbar. Click on the Format Picture icon. Click on the Size tab and adjust the size. Print out graphic.

4) Now is a good time to make sure that you like the size of the graphic. Place it on the t-shirt to make sure you like how it looks.
5) Cut out a piece of Wonder-Under as large as the entire monkey head. Place it (PAPER SIDE UP, rough side down) on top of the monkey graphic. Trace around the outer edge of the head and trace the facial features.

6) Iron this piece onto the tan piece of fabric.

7) Trace the parts of the head you want to be brown ( the outer parts of the ears and upper part of the head).

You could probably trace around all the brown part and make it one piece. I thought it would be difficult to cut out, so I cut the pieces out separately.
8) Iron these pieces on to the brown fabric.
9) Now that the Wonder-Under is ironed to the fabric, cut out all pieces along the trace lines. Here is what you'll have:

10) Peel the paper backing off of the BROWN PIECES OF FABRIC only. Place the brown ears and then the brown top of the head onto the tan piece of fabric. Iron.

11) Hold the monkey head up to a window so that you can see the tracings for the facial features. With a permanent fabric pen draw the eyes, nose, mouth.

If you would prefer, you can draw the facial features on lightly with a pencil and then go back and embroider them.
12) Peel the paper backing off of the tan piece of fabric. Place the monkey head on top of the t-shirt. Use a ruler if needed to center. Iron.

13) Optional- Iron a piece of the lightweight fusible interfacing (slightly larger than your graphic) on the inside of the shirt under the applique image. This adds stability to the knit fabric. Stitch around the monkey head to further secure the pieces.

Stitch VERY slowly and don't get too close to the edge of the fabric.
14) You're done!

For more tips and trips for simple machine applique go here.
Comments